Tubeless Setup Guide
Tubeless Tires: Less Flats, More Fun

Converting your bike to a tubeless tire system is an easy upgrade to just about any bike. In place of your tire’s inner tube, tubeless systems use a liquid sealant to repair punctures nearly instantly as they occur automatically. Without a tube, there are no punctured tubes or “pinch flats,” which occur when a conventional tube-and-tire setup compresses during a hard impact.
Benefits of Tubeless Tires
The most valuable benefit of having a tubeless tire setup on your bike is a drastic reduction in flat tires. Should an errant piece of debris find its way through your tire, a high-quality tubeless sealant helps seal that hole nearly instantly without any need to stop and make repairs. Tubeless setups also allow off-road riders to run lower pressures, averaging 7-10 psi (0.5-0.7 bar) below pressures with tubes, so that their tires deform over uneven surfaces, providing noticeable gains in traction and increased speed.
What About Tubeless for Road and Gravel Bikes?
With the right tubeless rims, rim tape, sealant, and tires, road and gravel bikes can run tubeless, just like mountain bikes. Though you’ll likely face different terrain on your drop bar bike, the same benefits of speed and traction via lower pressure (7-10 psi or 0.5-0.7 bar below tube pressures) still apply to skinnier tires, in addition to protection against flat tires. All of the major reputable tire companies produce tubeless options, which makes finding a set of tires easy.
What You Need to Set Up Tubeless Tires
Though uncomplicated, a proper tubeless tire system consists of several parts to ensure reliability over many miles of worry-free riding.

Tubeless Rims
If you purchased your bike within the past 10 years, there’s a good chance the rims on your wheels are “tubeless ready.” These rims may or may not already have tubeless tape installed on the rim bed, but the overall shape of the rim is conducive to holding the bead of a tubeless tire safely and securely. To confirm whether or not your current rims or tires are tubeless compatible, look for graphics that mention it directly on the product or contact the manufacturer for details.

What Size Rim Do I Need?
Whether purchasing a pair of rims for a custom wheel build or a set of ready-to-ride wheels, it’s important to pick the correct width rim for the tire size you intend to ride. To help guide riders looking for a new Stan’s rim or wheel, we’ve created the WideRight system–a quick and easy classification of tire ranges that best suits our rims.

| The Lightbulb | WideRight | The Bell |
| This rim is too narrow, evidenced by a constricted profile that resembles a household lightbulb. A poor combination that compromises traction and cornering stability. | The perfect width. This tire expands to full volume without distortion. The tread pattern and side knobs are in the correct position for cornering–maximum traction and control with minimum rolling resistance. | Too wide. This tire’s beads are pushed wide, deforming the intended tire shape and tread design. This tire has less ability to absorb impacts and less cornering control, and sidewalls are exposed to cuts. |
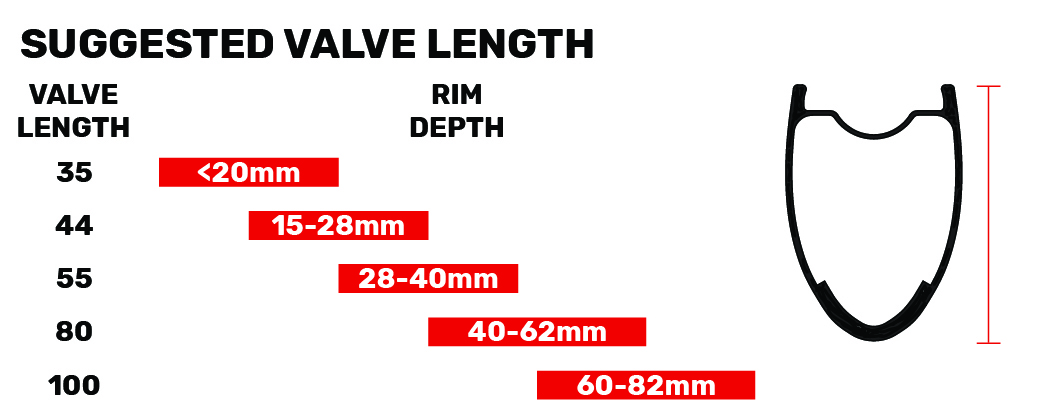
Tubeless Valves
Since we’re skipping the need for a tube, we’ll have to install an air valve directly onto the rim. Tubeless valves are nearly identical to the presta valve that’s connected to a tube, with some slight differences. Instead of a tube, the base of a tubeless valve has a wide rubber base that creates an airtight seal with your rim. The core of a tubeless valve is also removable so that liquid sealant can be injected without removing the tire from the rim. Just make sure to pick out a valve that’s suitable for the depth of your rim:
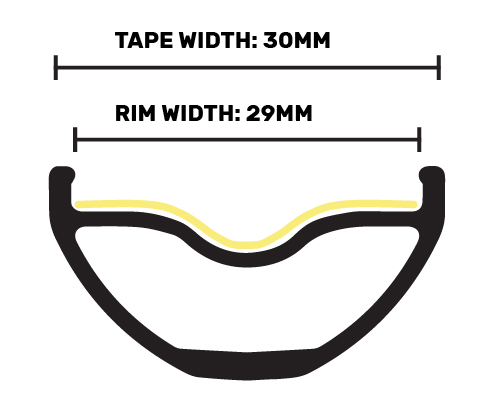
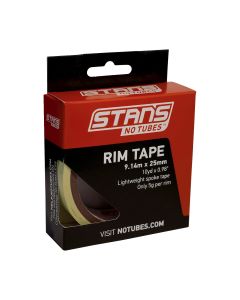
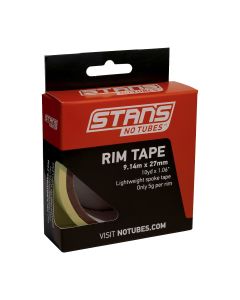
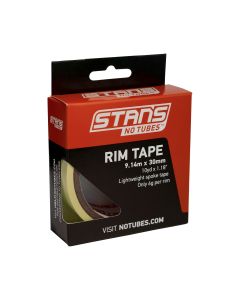
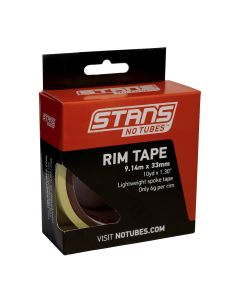
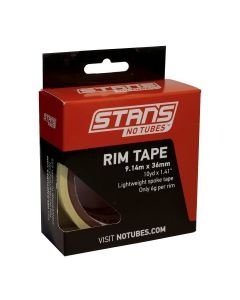
Tubeless Rim Tape
Protecting a tube from spoke holes is the only role conventional rim tape serves. For tubeless tires, we use a nonporous rim tape to form an airtight barrier over the spoke holes and with your tire. This airtight seal also protects your rim, spokes, and spoke nipples from exposure to moisture brought on by the sealant you’ll inject into the tire.
We make several widths of our tubeless rim tape to suit a variety of rims, starting at 21mm and going up to 39mm. As a rule of thumb, we suggest selecting a rim tape that’s 1-2 millimeters wider than the rim bed itself.
Tubeless Tires
Compared to a standard tire that uses a tube, tubeless tires are manufactured to a higher standard, which helps form a tight-fitting seal to your rim and prevents air from escaping. Many tire manufacturers will label their products with their tubeless tech, for example, Maxxis TR, Schwalbe TLE, and WTB TCS.
Tubeless Sealant

Tubeless tires and rims will hold air upon inflation, but it’s the sealant that makes a tubeless system safe and reliable for riding. During setup, tubeless sealant will fill any gaps between the tire’s bead and the rim’s bead channel to keep in the air. And while out riding, the rotation of your wheel will bring sealant in contact with punctures in the tire’s casing to seal them up and keep you riding. Depending on the size of the puncture, it may be necessary to add additional air or sealant to the tire as soon as it occurs.
Should I Use Stan’s Sealant or Stan’s Race Sealant?
For most riders, our standard sealant will be the most convenient choice for general riding needs. This go-to formula can seal punctures up to ¼” or 6.5 mm almost instantly and will stay liquid within your tires for 2-7 months, depending on your local climate. By using one of our 2 oz bottles or our injector, our standard sealant can be installed directly through your valve once the core is removed.
We developed our Race Sealant for riders who need to avoid flatting out at all costs. Compared to our standard formula, Stan’s Race Sealant uses twice the amount of sealant “crystals” and introduces additional XL-sized crystals to plug even bigger punctures. Because of the high concentration and oversized sealant crystals, our Race Sealant is not compatible with our injector and must be poured into the tire directly by unseating a portion of the tire’s bead. Inspect sealant levels every two weeks when using Stan’s Race Sealant.
When Should I Refill My Tires with Tubeless Sealant?
It’s important to refresh your tire’s sealant levels periodically. The amount of time between refills will vary with environmental factors like temperatures and humidity, in addition to the type of sealant you’re using. If you are using our standard Stan’s Tire Sealant, top off your sealant every 2-7 months through your valve stem with a 2 oz bottle or injector. Our Race Sealant has a shorter window of 2-3 weeks and must be added directly into the tire with at least a small portion of the bead removed from the rim.
How Much Sealant Do I Need in My Tire?
It’s all about volume; for instance, a 29x2.5” mountain bike tire will need more sealant than a 700x35c gravel tire. To help guide riders, we’ve put together this handy chart: Stan’s Sealant Volume Guide
Tools
These tools will make the installation and maintenance of your tubeless tire system quick and easy. Some are optional, while others are completely necessary!
- Valve Core Remover: This convenient tool helps pull out the valve’s core when you need to install sealant through the valve. With the core removed, you’ll be able to pump a higher volume of air into the tire quicker, making seating the tire’s bead an easier task. Highly recommended!
- Sealant Injector: Our injector first measures exact volumes of sealant, then threads directly onto your valve for a no-mess application.
- High-Volume Floor Pump or Air Compressor: Not all pumps are created equal, for easy at-home installation, we suggest using a floor pump optimized for high-volume tires to easily seat your tire’s bead onto the rim. If you already own a compressor for the use of pneumatic tools, then you just need a compressor head for presta valves to inflate your tires.

Tubeless Tire Set Up

Step 1: Taping Your Rim with Tubeless Rim Tape
If present, remove the tire and rim tape from your wheel and thoroughly clean the rim bed with isopropyl alcohol and a lint-free rag. Begin by applying rim tape opposite of the rim’s valve hole, ensuring the tape is kept very taught. View our video below for more details, techniques, and tricks for applying the rim tape:
Step 2: Install Valves
Locate the valve hole on your rim and use a pick or awl to poke a hole through the tape. Enlarge the hole with a rounded file, removing excess tape in the process. Remove the threaded washer, press the valve through the valve hole, then secure it firmly with the threaded washer. This step is covered in the taping installation video below:
Step 3: Install Tire
Note the direction of your tire tread and place the wheel in the center of the tire. Starting with one side, work the bead of the tire onto the rim. With the second side, start opposite of the valve and begin working the tire bead onto the rim. When you start getting close to the valve, stop and apply sealant if you wish to use the direct pour method, which is a requirement for Stan’s Race Sealant. Spray soapy water around both beads of the tire to encourage easy seating then inflate with a floor pump or compressor to “snap” the beads into place. Caution: do not exceed the either pressures stated on your rim or tire.
Step 4: Add Sealant
Consult the Stan’s Sealant Volume Guide to determine how much sealant to use in your tires. Remove valve core with a Valve Core Remover and use a Sealant Injector or 2 oz Sealant Bottle to inject sealant into the tire. Reinstall valve core and inflate to desired riding pressure, then rotate the wheel to make sure sealant reaches any spots where air could be escaping the tire.
Troubleshooting Your Tubeless Setup

On-the-trail tubeless tire repair with the DART tool
Tubeless Tire Repair
It’s happened to all of us: a puncture so serious that sealant alone cannot seal the gash caused by sharp, jagged debris in the road or trail. There are a number of tire plug tools on the market for repairing serious punctures on tubeless tires, but the Stan’s DART is only the plug tool that uses both a physical and chemical reaction to plug holes more effectively.
Tire Won’t Install with Floor Pump
Certain rim and tire combinations may be difficult to seat with a floor pump at home. Removing your valve core with a valve core remover can allow for more air to flow through the valve and can help seat difficult tires. If you're still experiencing problems, visit your local bike shop for some assistance in seating the tires with a compressor.
Air Leaks from Tires Over Time
Ensure that your valve is installed tightly in the rim bed. It’s also possible that your wheel needs to be retaped if the current tubeless rim tape is no longer centered, allowing air to escape from the tire and rim. Uninstall the tire and tape wipe clean with alcohol, and install new rim tape.
Sealant Weeping from Sides of the Tire
This is the natural process of the sealant evaporating. It is more evident in some tires but is nothing to be overly concerned about. This “weeping” does not impact the effectiveness of the sealant. The weeping will dissipate as the sealant seals the casing of the tire. More porous tires may require a sealant refresh shortly after the initial setup.
Trouble Adding Air to Tires
It’s common to experience clogged valves over time. Simply remove the core with a valve remover, then clean or replace the valve core.